Getting Started _OLD EDITOR
Step 1: Choose which projects to see on the timeline
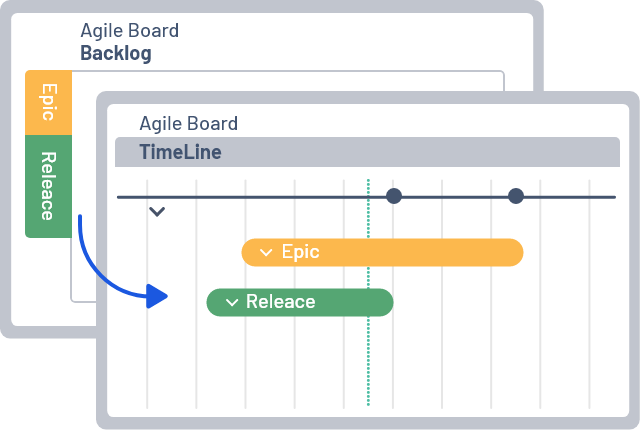
A TimeLine will be visualized for each project that has issues in the selected Agile Board.
Open (or create if needed) an Agile board which contains the issues of these projects
Step 2: Choose which Epics Bars would you like to see
On the timeline will be shown all Epics that are visible on the selected agile board
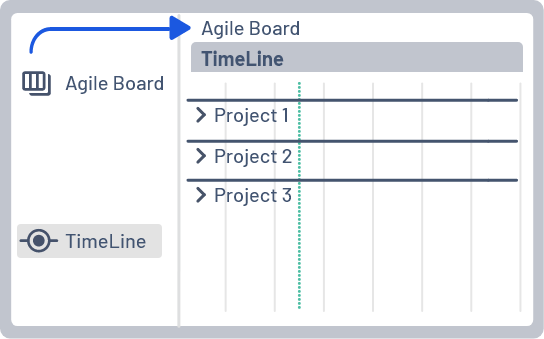
Step 3: Open your timeline
Navigate and open the Agile Board which contains the scope (Projects & Epics) you want to see on the timeline
Click on Project TimeLine
- Timeline works with Scrum, Kanban and projects without board

Step 4: Choose your Persona
- Next Steps as Scrum Master (Sprint / Epic level planning)
- Next Steps as Project Manager (cross team/ project Release planning)
- Next Steps as High Level Manager (only reporting and visibility)